Recorder – Screen & Webcam Recording
Introduction
Recorder is a recording tool included in Icareus Video Cloud that allows you to record your screen, webcam, or both at the same time. Recordings can be saved directly to the media library for later use.
Recorder is suitable for example for:
- recording training videos
- recording presentations or demos
- creating screen capture videos
- creating picture-in-picture presentations where both the camera and the screen are visible
Recorder can be opened from the Studio project page using the Recorder button in the top bar.
Camera and Microphone Permissions
When you open Recorder for the first time, the application will request permission from your browser to access your camera and microphone. These permissions are required for Recorder to capture video and audio.
A modal titled “Allow camera and microphone access” will appear, where Recorder waits for permission from your browser.
A modal titled “Allow camera and microphone access” will appear, where Recorder waits for permission from your browser.
Your browser will show a permission request asking to allow recorder.icareus.com to use your camera and microphone.
The location and form of this request depend on your browser and its settings.
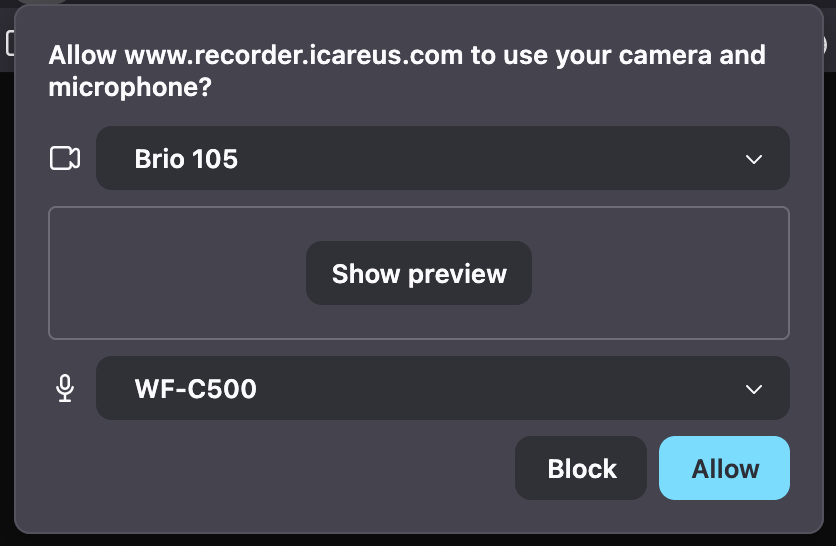
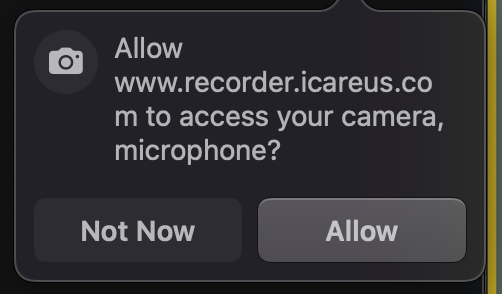
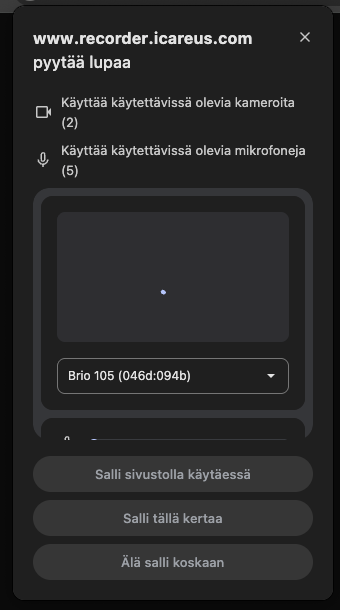
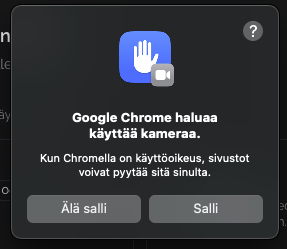
Your device’s operating system may also ask separately for permission to use the camera if you have not previously used the camera with this browser.
Select Allow to continue.
The location and form of this request depend on your browser and its settings.
Your device’s operating system may also ask separately for permission to use the camera if you have not previously used the camera with this browser.
Select Allow to continue.
Once permission is granted, Recorder will automatically open the recording interface where you can configure recording settings before starting the recording.
If Permission Is Blocked
If you did not grant permission or your browser blocks it, the camera and microphone will not be available.
You can enable the permissions as follows (details again depending on your browser):
You can enable the permissions as follows (details again depending on your browser):
- Click the lock or camera icon next to the browser’s address bar.
- Open Site settings or Permissions.
- Set Camera and Microphone to Allow.
- Refresh the page.
Recording Settings
Recording settings are located on the right side of the interface.
Layout
Select how the camera and screen appear in the recording.
Options:
Options:
- Side-by-side – camera and screen appear next to each other
- Camera only – records only the webcam
- Screen only – records only the screen
Webcam Recording
Select the camera and microphone settings.
Camera
Choose the webcam to use from the dropdown menu.
Microphone
Choose the microphone used for recording from the dropdown menu.
An audio level meter shows the microphone activity.
Advanced Settings
Advanced settings allow you to adjust the camera recording quality.
If the recording stutters or your camera causes performance issues, you can limit the camera resolution or FPS.
If the recording stutters or your camera causes performance issues, you can limit the camera resolution or FPS.
Resolution
Select the resolution for the camera recording.
By default, the camera uses full resolution, but you can limit it to:
- 1080p
- 720p
- 480p
Lower resolutions may improve recording stability on slower devices.
Minimum FPS
Defines the minimum frame rate of the recording.
Available options:
- Default
- At least 30 FPS
A higher frame rate can make the video smoother but may increase system load.
Screen Recording
Choose which audio is included in the screen recording.
Options:
- Screen only (microphone optional)
- Screen + system audio
When you select an option, your browser will open its own Share dialog. From there you can choose what to capture, such as:
- the entire screen
- a specific window
- a browser tab
The available options and their names may vary depending on the browser.
Example: Chrome


System audio recording is not supported in all browsers.
Starting the Recording
Once the settings are configured, click Start Recording.
During the recording you will see:
During the recording you will see:
- recording duration
- active recording sources (camera / screen / audio)
- remaining time (maximum recording length is 2 hours)
During recording, the camera and screen areas will display a red border and a REC indicator.
Stopping the Recording
Stop the recording by clicking Stop Recording.

Recording can only be stopped after 15 seconds from the start of the recording.
After the Recording
Once the recording is finished, you will see a preview of the recorded videos.
If you recorded both the camera and the screen, they will appear as separate videos.
You can:
If you recorded both the camera and the screen, they will appear as separate videos.
You can:
- Add the recordings to the media library
- Discard the recording
Adding the Recording to the Media Library
Click Add to Media Library to save the recordings to the Icareus Video Cloud media library.
Camera and screen recordings are saved as separate videos. If you record both simultaneously, two videos will be added to the media library.
Clicking the Open button in the lower-right corner of the preview opens the settings page of that video in the Media Library.
The default video name is Untitled, but it can be changed later in the video settings.
You can optionally use Studio to create a picture-in-picture video where both recordings appear simultaneously.
Discarding the Recording
Click Discard if you do not want to save the recording.
The system will ask for confirmation before deleting the recording.
Related Articles
Introduction to Icareus Studio
Icareus Studio is an easy-to use browser based video editor tool for all the marketing, communication, training and video content people that want to produce branded video content fast in Icareus Suite video cloud environment easily and fast without ...Media Tools & Settings
Introduction The Media Tools & Settings panel allows you to add and manage content in your project. With the top four icons, you can add videos, text, audio and images. You can also add effects and styling to the added elements. Use the bottom icon ...Getting started with Icareus Studio
Introduction The Icareus Studio editor is where you create and edit your videos. The interface is divided into several main areas: the top bar, media panel, preview canvas, and timeline. This article provides an overview of each section and links to ...Screen capture
Introduction Screen capture feature enables you to make screen captures and provide audio commentary/explanations while you are doing it. It is thus very convenient to e.g. create short help/howto videos. Making a Screen Capture - Full screen Screen ...Brand Media
Introduction to Brand Media The concept of brand media is that all users can insert brand media files to their videos so that they follow the brand guidelines of your organization. This can include, for example, graphics following the visual ...